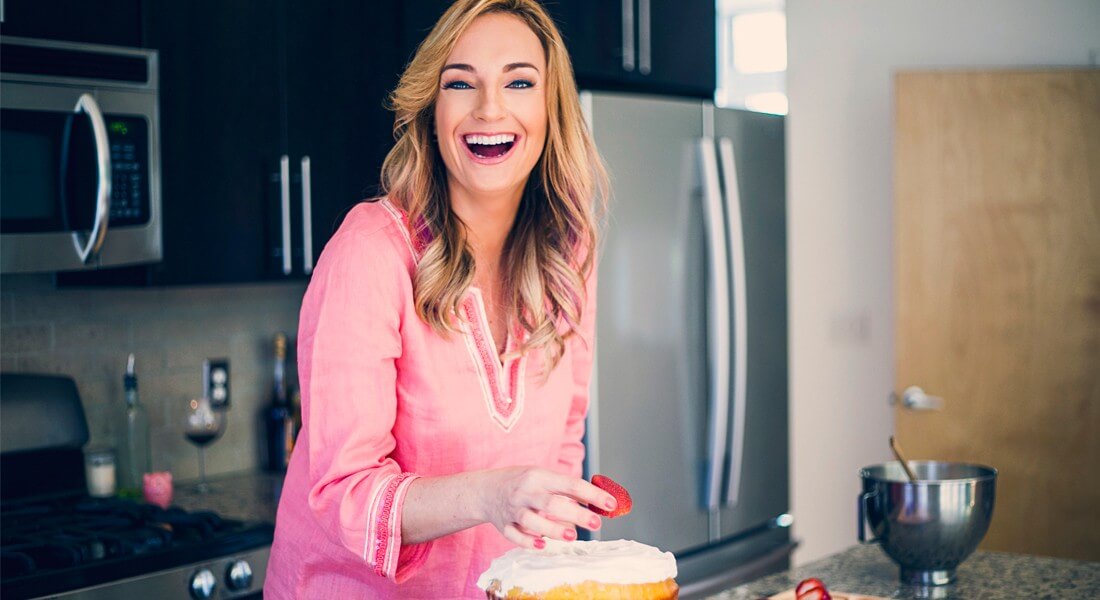
OMG Bars

Coming back for more?  Thought so!

Coming back for more? Thought so!

When I posted the above pic on Facebook, my friend Ashley from the laugh out loud witty + pretty website commented that she made something similar and called them “Orgasm Bars.”  These super sweet morsels of decadence should be considered “MULTIPLE Orgasm Bars” cuz you’ll be, um, coming (back to the kitchen) for a second helping.

Ingredients

1 stick butter

2 cups graham cracker crumbs

1 cup chocolate chips

Chocolate syrup

1 cup butterscotch chips

1 cup toffee bits

1 cup sweetened coconut shreds

1 can sweetened condensed milk

Directions: Melt butter and mix with graham cracker crumbs and press down into an 8 x 8 inch pan.  Add chocolate chips and then drizzle with chocolate syrup.  Top with layers of butterscotch chips, toffee bits and coconut.  Pour the can of condensed milk on top.

Bake at 350 for 20-25 minutes until golden.  Straight outta the oven with some vanilla ice-cream?  Fuhgeddaboutit.

But I actually liked them best right out of the fridge the next morning.  OMG Breakfast Bar?  Climax to my day…

Gooey, melty, choco-toffee-butteryscotchy delish

Gooey, melty, choco-toffee-butteryscotchy delish

Like this post? Share it!
Share on FacebookTweet about this on TwitterPin on PinterestShare on Google+Email this to someone

Meaty Monday: Chipotle Turkey Roll with Guaco-Cream

Trifecta of Delish: Cheesy, Spicy, Crunchy!

Trifecta of Delish: Cheesy, Spicy, Crunchy!

Phyllo dough is the NeNe of Culinary Housewives– super high maintenance, super rich, but oh-so-worth the drama.

Making the filling for this is easy, so get that over first, so you can concentrate on the dough!

$$$  NeNe would agree. $$$

Filling:

1.3 pound package of ground turkey

Spice Mixture (recipe below)

1 cup chicken stock

1/2 block (4 oz) of full-fat cream cheese

3 Tb adobo sauce (from a can of chipotles)

1/4 cup (handful) of chopped fresh cilantro

Spice Mixture:

1 tsp chili powder

1 tsp cumin

1 tsp coriander

1 tsp garlic powder

1 tsp kosher salt

1/2 tsp cinnamon

Directions: Brown turkey meat (do not drain) and add spice mixture with the chicken stock.  Simmer for 10 minutes on low to combine and reduce broth.  Add cream cheese, adobo sauce and cilantro, stir until cream cheese melts and combines with turkey mixture.

NOW PAY ATTENTION, LOVELIES.  Here’s the phyllo fun….

Phyllo– (pronounced FEE-lo, by the way, which I botched for years…I thought it was FIE-lo) is paper thin sheets of unleavened dough.  You get it in the freezer section near the frozen pies/pastries at the grocery store.  Let the package defrost for an hour or two before you attempt to use it.

You’re going to need 10 single phyllo sheets and a stick of butter melted.  Yes, a whole stick.  It’s worth it, I promise.

It’s easiest to use a large baking sheet with tin foil that is sprayed with some cooking spray.  Then lay out your first sheet of Phyllo.  Using a spoon, or a basting brush, drizzle some butter on the phyllo sheet.  It doesn’t have to be even, just get it around all four corners and some in the middle.

Spread some butter over the first sheet of phyllo-- a basting brush makes it easy

Spread some butter over the first sheet of phyllo– a basting brush makes it easy

Then, add a second sheet, brush on more butter.  Add a third sheet, brush on more butter.  Add a fourth sheet, and so on and so on, till you get ten, (yes, 10!) sheets of buttered phyllo piled on top of one another.  It’s OK if the sheets rip a little, they’re all going to be baked in a layer so no one will notice if there’s a tear.

Layer 10 sheets of buttered phyllo dough

Layer 10 sheets of buttered phyllo dough

Next, take that creamy, chipotle turkey mixture and spoon it out lengthwise, close to the edge of phyllo so you can start to roll it up.

Spoon out turkey mixture onto phyllo off center, closer to the edge

Spoon out turkey mixture onto phyllo off center, closer to the edge

Then, start to roll up the phyllo dough burrito style…be gentle, cuz it’s a delicate process!

Gently, now...start to roll the phyllo

Gently, now…start to roll the phyllo

End with seam side down and brush with a little more butter on top of the roll.

Now you're turkey roll is ready to bake, baby!

Now you’re turkey roll is ready to bake, baby!

Once you have your turkey roll buttered (again)! Bake at 350 for 20 minutes until browned.

I serve it with some guaco-cream on the side.  The fresh garlic gives it a real kick and is the perfect companion to the turkey roll.  Here’s that recipe:

Guaco-Cream

Mix in food processor:

1 avocado

2 garlic cloves

1/2 lime

pinch of kosher salt

1 tsp honey

Scrumptious on a plate

Scrumptious on a plate


Like this post? Share it!
Share on FacebookTweet about this on TwitterPin on PinterestShare on Google+Email this to someone

Creamed Jalapeño Corn

Creamy, corny yum...

Creamy, corny yum…

I normally make roasted corn with jalapeños as a side dish for any Mexican meal because it’s JP’s favorite.  This time, I decided to change it up a bit and add a creamy, cheesy component.  Ever since I discovered the joys of low-carb living, adding cheese to meals is a welcome indulgence!  Corn isn’t exactly low-carb, but I consider it a culinary “accessory”– a little goes a long way.

Ingredients

4 ears of corn on the cob, kernels sliced off

1 fresh jalapeño diced

4 oz full fat cream cheese (half a box)

1/4 cup – 1/2 cup heavy cream (depending on what consistency you want)

Palmful of chopped fresh cilantro

1 Tb olive oil

Directions: Saute corn and jalapeño in olive oil on medium heat until softened, about 10 minutes.  I like to crank up the heat a bit and get the corn a little charred, but that’s just me.  Then add the cream cheese and heavy cream and stir until melted and combined.  Top with fresh cilantro.

Like this post? Share it!
Share on FacebookTweet about this on TwitterPin on PinterestShare on Google+Email this to someone

Dixie’s Cheesecake

Cheesecake Queens

Cheesecake Queens

Recently, I had the pleasure of cooking with the cutest Dairy Farmer in the state of Georgia….Meet Dixie Truelove.  (Yes, that’s her real name!) We collaborated on some feature pieces for CBS about dairy farmers and she shared her family’s famous recipe with me.  When she’s not managing her 300 acre dairy farm, she bakes a bad ass cheesecake.  GetinmymouthRAWTnow kinda good.

She also taught me that milking cows in hot pink heels is not recommended…but the overalls are hot, no?

City Girl in the Country...hot pink stilettos optional

City Girl in the Country…hot pink stilettos optional

Dixie’s Cheesecake

Ingredients

Crust:

1 1/4 cups graham cracker crumbs

3 Tb melted butter

Filling:

2 (8oz) containers plus 3oz of full fat cream cheese

1 cup sugar

3 eggs

1/4 tsp vanilla extract

3/4 cup sour cream to spread on top of cheesecake

Directions: Mix 3 Tb melted butter with the graham cracker crumbs and press down into springform pan.  Bake for 10 minutes at 350.
Turn down oven to 300.

In mixer, blend cream cheese, vanilla, sugar and 3 eggs, mixing after each egg is added.  Pour into crust and bake for one hour uncovered at 300 degrees.

And if you want to watch an udderly fabulous milking lesson….(I thought you’d never ask!)  Here’s more Dixie and Parker on the Dairy Farm:

Like this post? Share it!
Share on FacebookTweet about this on TwitterPin on PinterestShare on Google+Email this to someone

Shaken Taters…AKA the best damn roasted potatoes. Ever.

Shake Your Money Maker!

Shake Your Money Maker!

Yes, that is my messy, 1970’s drab chic kitchen.  Notice the box of wine and my Goodwill microwave.  That’s how I roll, y’all!  I digress.

I like my martinis and my potatoes SHAKEN, not stirred.

I grew up with a New England family who served rich roasts like pot roast and roast chicken every Sunday and there were always roast potatoes with thick gravy on the plate.  My Mom, her mother and her mother before her all made roast potatoes the same way:  Peel, boil, roast.  And they were delicious.  But I add a step.

SHAKE, baby SHAKE!  The potato slam displaces the starch, so the insides stay soft and the outside gets crispi-fied. (Sorry Mom, Grandma Ronnie and Great Grandma Nea, but mine are waaaaaay better!)

Here’s how to make them.  Preheat oven to 400.  Peel and slice Yukon gold potatoes lengthwise like this:

Peel then slice

Peel then slice

Then toss them into a big pot of boiling water for exactly 5 minutes.  You want them to get a little tender, but not soft enough to mash.  I always put a timer on or my ADD brain will get distracted and I’ll overcook them.  5 minutes.  That’s it!  Drain immediately.

Drain your taters!

Drain your taters!

OK, the fun part is about to start.  Are you ready?  Put the taters BACK INTO THE POT WITH THE LID ON.

Hold onto the top and sides and shakebabyshakebabyshake!!  Like the classic Cars song goes, Shake it up!  You’re gonna make the taters a little messy– that’s the whole plan.  Trust me.  Do it for a solid 30 seconds.  You’re making the best potatoes of your life and getting a bicep workout.  Your welcome!

There should be little bits of tater all over your lid after the shake!

There should be little bits of tater all over your lid after the shake!

Now, drizzle some olive oil in the pan and stir to coat.  I pour the shaken taters onto a greased wide rimmed cookie sheet and sprinkle with some Montreal Steak Seasoning.  I love that stuff.  Bake for 20-25 minutes and then turn over.  Bake another 20-25 minutes until thoroughly crispi-fied.

They’ll look like this:

Shaken Taters, baked and ready to eat

Shaken Taters, baked and ready to eat

Shaken Taters are good enough to serve alone.  Warning:  Carb coma may occur.

Like this post? Share it!
Share on FacebookTweet about this on TwitterPin on PinterestShare on Google+Email this to someone

Gluten-free, Dairy Free Orange Zested Chocolate Mousse

Gluten-Free and Full of DELISH

Gluten-Free and Full of DELISH

Ever since I started having gluten issues, I’ve been experimenting with new dessert recipes, cuz pie crust and cookies ain’t my friend!  This mousse is so easy and all you need is a blender to whip it into frothy deliciousness.

Ingredients

1 bag chocolate chips (or 12 oz of your favorite dark chocolate)

Juice from 1/4 of an orange

1 tsp vanilla

2 Tb Grand Marnier

4 eggs

8 oz hot coffee

Directions:  Put everything except the hot coffee in a blender and blend for one minute.  Mixture will be frothy and chunky.  Turn blender back on add the 8oz of hot coffee until everything melts and combines– another minute or so.

Pour into your fave mousse cups and refrigerate for 2 hours before serving.

Top with whipped cream (if you can eat dairy!), grated orange zest and grated dark chocolate.

SCRUMPTIOUS!

Like this post? Share it!
Share on FacebookTweet about this on TwitterPin on PinterestShare on Google+Email this to someone

It’s Crunch Time! Candy Crunch, that is…

My bite is worse than my bark!

My bite is worse than my bark!


How many times have you spent waaaaay too much money on designer candy bark??  One time is too many when you can make it for a fraction of the price at home!  It’s super easy and melt-in-your-mouth-delish.  This is an awesome project to do with the kids!  I found all of my ingredients at Cake Art, including the nifty little melting pot– just pour the white chocolate wafers in and BAM.  Melty, yummy, easy.  Add your favorite crunch flavor (there are a zillion combinations– like lemon crunch/white chocolate, tangerine crunch/chocolate, cherry cordial crunch/dark chocolate, cinnamon crunch/white chocolate, butterscotch crunch/milk chocolate– I like crumbling mint Oreos into white chocolate) and pour onto parchment paper.  Sprinkle with more crunch and freeze for 9 minutes.  That’s IT!

Ingredients

1 pound bag of white chocolate melting wafers

1 bag of peppermint crunch

Parchment paper

Directions:  Melt chocolate wafers in a double boiler (same way I did for the Halloween pops) or in Wilton’s Melting Pot.  It takes about 5 minutes to melt, stirring occasionally.  *Mix in about a half bag of peppermint crunch, stir to combine.  Pour onto parchment paper, add more crunch and freeze for 9 minutes.  Break into delicious bites of bark!  Put some in cute holiday bags with some curling ribbon and these make great stocking stuffers and office gifts.

*Candy experts recommend 1/2 cup of crunch for every 1 pound of chocolate.  I always add more!

Candy Crunchy Delish

Candy Crunchy Delish

Like this post? Share it!
Share on FacebookTweet about this on TwitterPin on PinterestShare on Google+Email this to someone

Meaty Monday: Crockpot Orange Star Chicken

You'll be the STAR of your dinner party with Orange Star Chicken!

You’ll be the STAR of your dinner party with Orange Star Chicken!

‘Tis the season for entertaining…..how about a one pot meal that will wow your friends and family with zero high maintenance prep work?  Meet Orange Star Chicken.  You’ll be the star of your party…and get to spend your evening sipping on a holiday cocktail instead of stressing in the kitchen!  This is fabulous served with  rice noodles…

Ingredients

1 package chicken drumsticks, skin removed

1 box of low sodium chicken stock

¾ cup soy sauce

½ cup brown sugar (low carbers, sub out for 1/4 cup truvia)

4-5 pieces of orange peel

4 spring onions chopped

2 Tb garlic chopped

1 Tb whole black peppercorns

5 star anise pieces

3 Tb fresh ginger

1 jalapeno chopped

Juice of one orange

2 Tb dry sherry

Chopped cilantro for garnish

Directions: Mix and cook on low for 6-7 hours or on high for 3-4 hours

Serve over rice or rice noodles (Pad Thai noodles work great!)

Like this post? Share it!
Share on FacebookTweet about this on TwitterPin on PinterestShare on Google+Email this to someone

Nut-free Pesto

Go nuts...without the nuts!

Go nuts…without the nuts!

Lately, nuts have been giving me itchy, bumpy hives doing not so nice things to my complexion.  Pesto is one of my favorite toppings for pasta and pizza– hell, I’d even spoon that green goodness onto my cereal.  Pesto Crispies, anyone?  Anyhoo,  I needed an allergy-free solution: I give you, NUT-FREE pesto.  Almost, as good as the real deal.
INGREDIENTS
2 cups basil leaves
3 Tb parsley
1/3 cup freshly grated parmesan
1/3 cup + 3 Tb olive oil
1/4 cup unsalted sunflower seeds
4 fresh garlic cloves
1/2 ts of salt (salt to taste since the parmesan adds quite a bit of saltiness)
Blend all ingredients in food processor. Add a Tb or two of water if you want to thin it down. Spread on fish before baking, or mix into pasta….or dip pieces of pita into it! DELISH!
Like this post? Share it!
Share on FacebookTweet about this on TwitterPin on PinterestShare on Google+Email this to someone

Best Onion Rings…EVER.

Onion rings in Heaven

Onion rings in Heaven

Think you died and went to heaven last time you went to Outback for a blooming onion?  Well hold onto your bloomers, lovelies, and get ready for The. Best. Onion. Rings. EVER.

The batter turns out light and crispy– I actually want to experiment with this battered on fish tacos. I’ll report back results…in the meantime, report back to me on Facebook with photos of your success– and I promise, your onion breath will be forgiven.

Ingredients

2 large onions sliced into rings

1 cup flour

2 cups buttermilk

1 tsp baking powder

1 Tb sugar

1/2 tsp kosher salt

Canola oil for frying

Batter: Whisk  flour, buttermilk, sugar, baking powder and salt until smooth.

Heat 2 inches of oil on medium high in a Dutch oven or wide rimmed, deep frying pan.  The oil is ready when you hear a *sizzle* if you flick a few drops of water in the pan.  If you hear a *crackle*, the oil is too hot, so turn that bad boy down.

Dip onion rings in batter, coating well…..Fry till golden.

The batter will puff up in the oil, making it super light and crunchy!

The batter will puff up in the oil, making it super light and crunchy!

Drain on paper towels, serve immediately!

Like this post? Share it!
Share on FacebookTweet about this on TwitterPin on PinterestShare on Google+Email this to someone